Simplest Demo for Displaying Image Processing Results using PySide6
The Deep Learning algorithm applications, especially image processing algorithms, its results are always needed to be displayed visually. Raw OpenCV imshow stuff is simple but not enough, failed on expansibility and maintainability. The Qt library, on the other side, is a well-developed UI framework that is evolved from C/C++ and is available in python now. The PyQt4/PyQt5 packages are from the community, and PySide2/PySide6 packages are from Qt officially. We will use PySide6 here, for it’s newer and official. The data wrappers, which are used for images data, are always OpenCV Mat. Here’s the workflow. Images are captured from camera devices or video stream/files and decoded into OpenCV mat one by one, then given to the algorithm for further processing. Finally, the UI framework, Qt, takes over the results display work.
Import packages,
import sys # needed by PySide6

from PySide6 import QtWidgets
from PySide6 import QtGui, QtCore
from PySide6.QtCore import *
from PySide6.QtGui import *
from PySide6.QtWidgets import QFileDialog, QMainWindow, QMessageBox

from generated_files.uic.mainwindow import Ui_MainWindow

import cv2
import numpy as np # cv2 mat is wrapped by numpy
Create a main window class from Qt QMainWindow.
class MainWindow(QMainWindow):

    def __init__(self):
        #QWidget.__init__(self)
        super(MainWindow, self).__init__()
        self.ui = Ui_MainWindow()
        self.ui.setupUi(self)
Create main function,
if __name__ == '__main__':
    app = QtWidgets.QApplication(sys.argv)
    win = MainWindow()
    win.show()
    sys.exit(app.exec_())
Now a blank window is created.
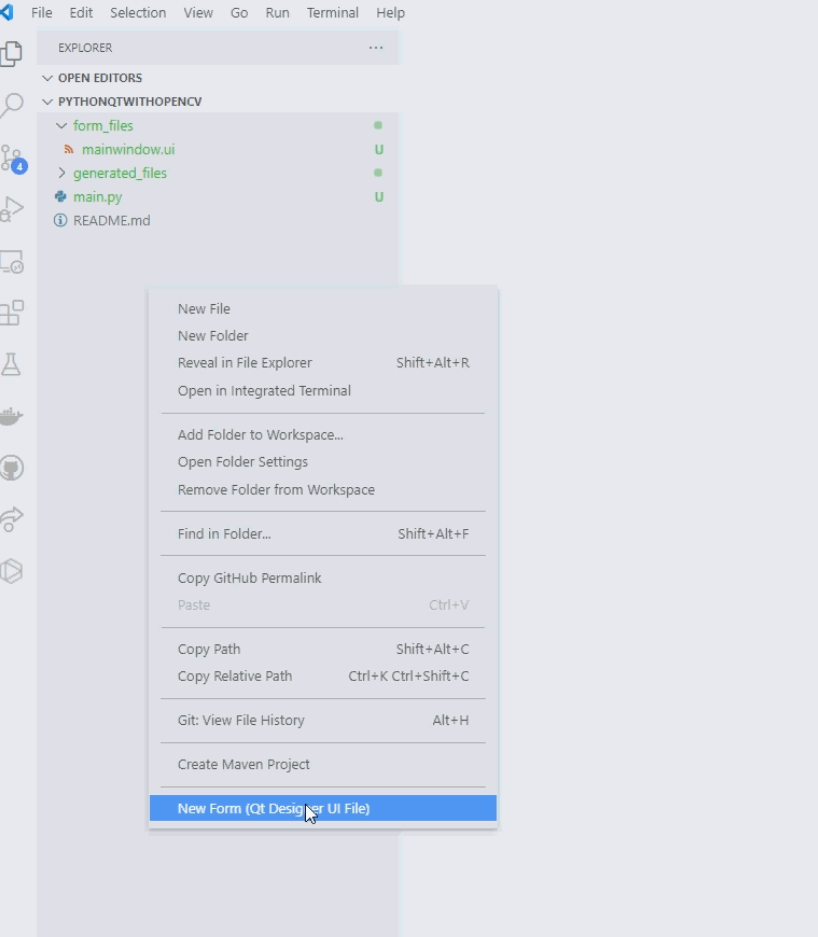
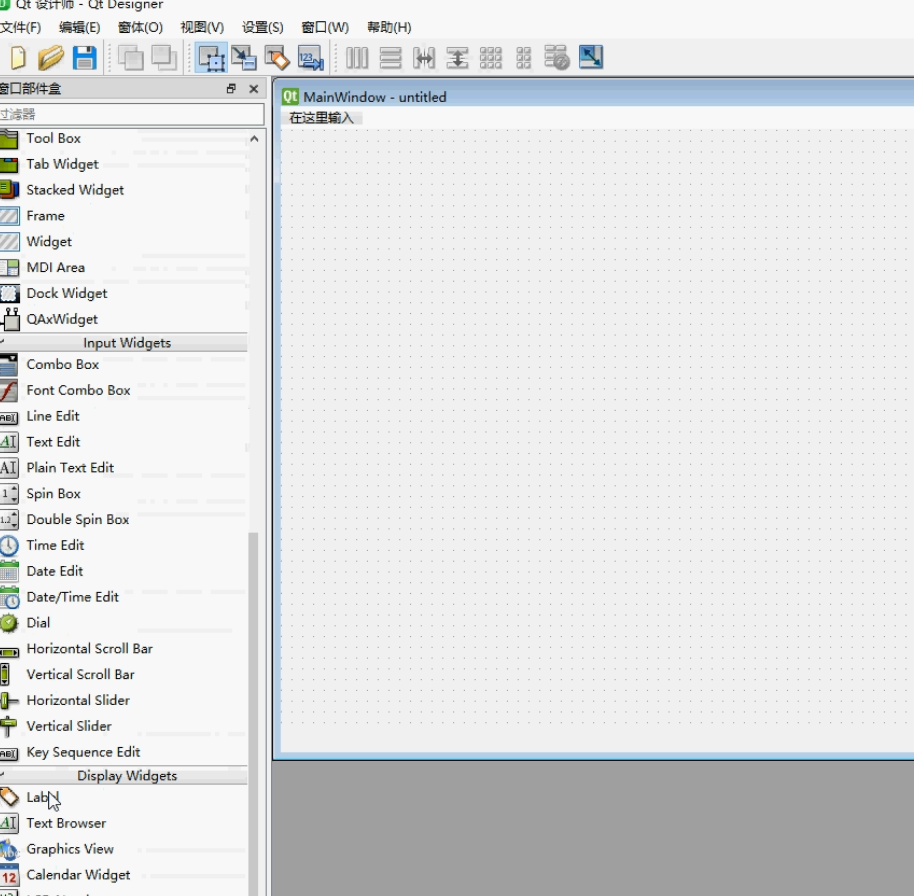
Create a qt form file by Disigner.
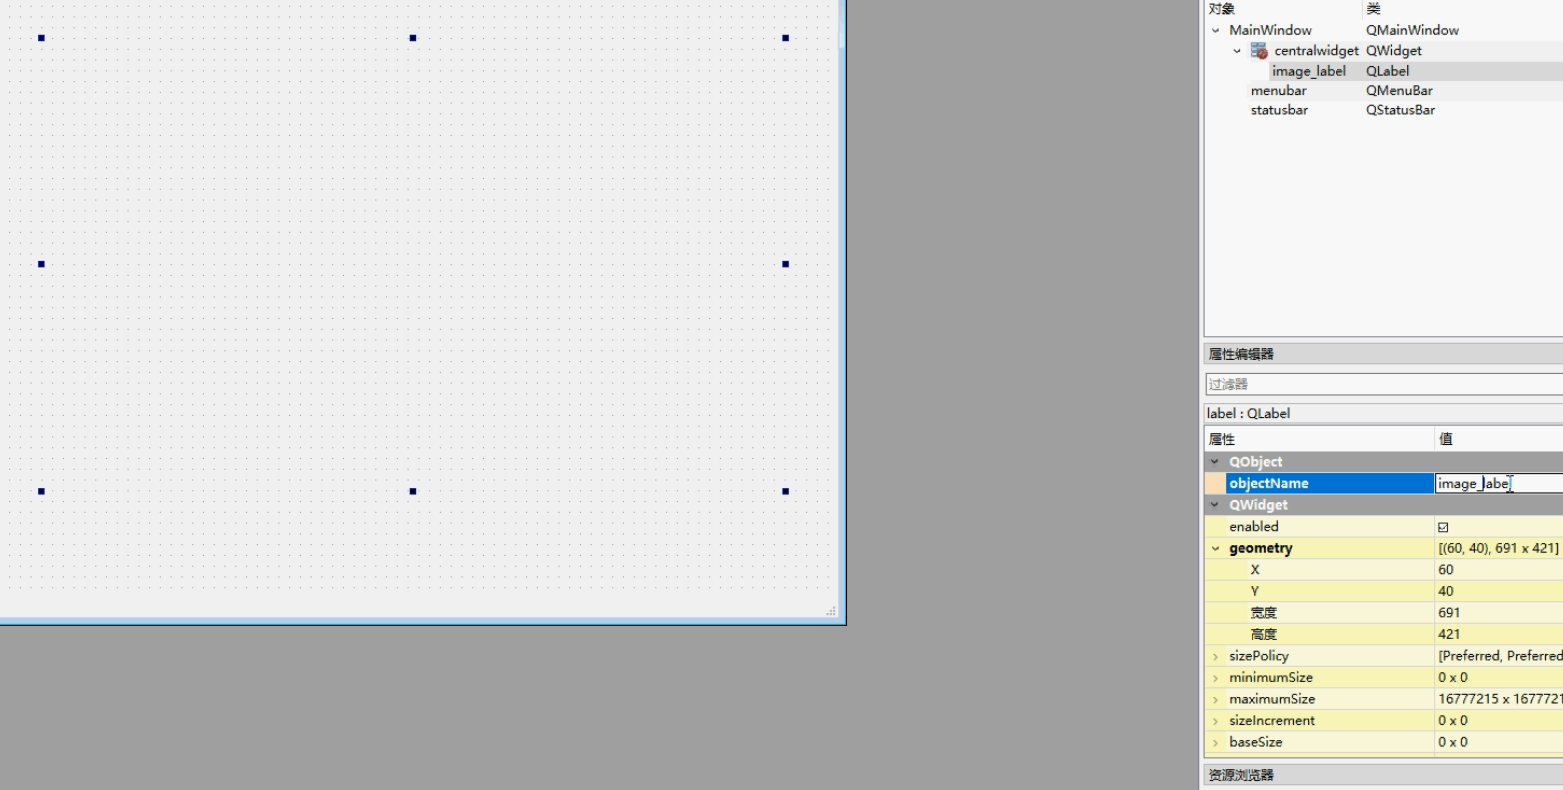
add label widget on window.
Clear the text in label and change label’s object name into image_label
Add code for data capture. We use OpenCV to open the camera device, and add a timer to keep on getting images from camera. We define a method named display_video_stream to read image from camera and display it on MainWindow. The timer object will connected with this method and call it every 30ms.
class MainWindow(QMainWindow):

    def __init__(self):
        #QWidget.__init__(self)
        super(MainWindow, self).__init__()
        self.ui = Ui_MainWindow()
        self.ui.setupUi(self)
        self.timer=QTimer()
        self.timer.timeout.connect(self.display_video_stream)
        self.cap = cv2.VideoCapture(0) # call default camera device
        self.timer.start()

    def display_video_stream(self):
        '''Display video stream from usb camera'''
        ret, frame = self.cap.read() # get status and frame
        self.display(frame)
The format of image data captured by OpenCV is needed to be converted to display on Qt Label widget correctly. We define a method named display to do this work.
def display(self, frame):
    '''display frame from opencv'''
    frame = cv2.cvtColor(frame, cv2.COLOR_BGR2RGB)

    image = QImage(frame, frame.shape[1], frame.shape[0],
                    frame.strides[0], QImage.Format_RGB888)

    self.ui.image_label.setPixmap(QPixmap.fromImage(image))
Done.
The whole file is like below.
import sys

from PySide6 import QtWidgets
from PySide6 import QtGui, QtCore
from PySide6.QtCore import *
from PySide6.QtGui import *
from PySide6.QtWidgets import QFileDialog, QMainWindow, QMessageBox

from generated_files.uic.mainwindow import Ui_MainWindow

import cv2
import numpy as np

class MainWindow(QMainWindow):

    def __init__(self):
        #QWidget.__init__(self)
        super(MainWindow, self).__init__()
        self.ui = Ui_MainWindow()
        self.ui.setupUi(self)
        self.timer=QTimer()
        self.timer.timeout.connect(self.display_video_stream)
        self.cap = cv2.VideoCapture(0) # call default camera device
        self.timer.start()

    def display(self, frame):
        '''display frame from opencv'''
        frame = cv2.cvtColor(frame, cv2.COLOR_BGR2RGB)

        image = QImage(frame, frame.shape[1], frame.shape[0],
                        frame.strides[0], QImage.Format_RGB888)

        self.ui.image_label.setPixmap(QPixmap.fromImage(image))

    def display_video_stream(self):
        '''Display video stream from usb camera'''
        ret, frame = self.cap.read() # get status and frame
        self.display(frame)

if __name__ == '__main__':
    app = QtWidgets.QApplication(sys.argv)
    win = MainWindow()
    win.show()
    sys.exit(app.exec_())
Simple. 😊
The whole project is here https://github.com/BigBookPlus/PythonQtWithOpenCV.git.